Step 1: Open Arduino IDE (2.x recommended).
Step 2: Open Preferences
- Windows/Linux: File → Preferences
- macOS: Arduino IDE → Settings/Preferences


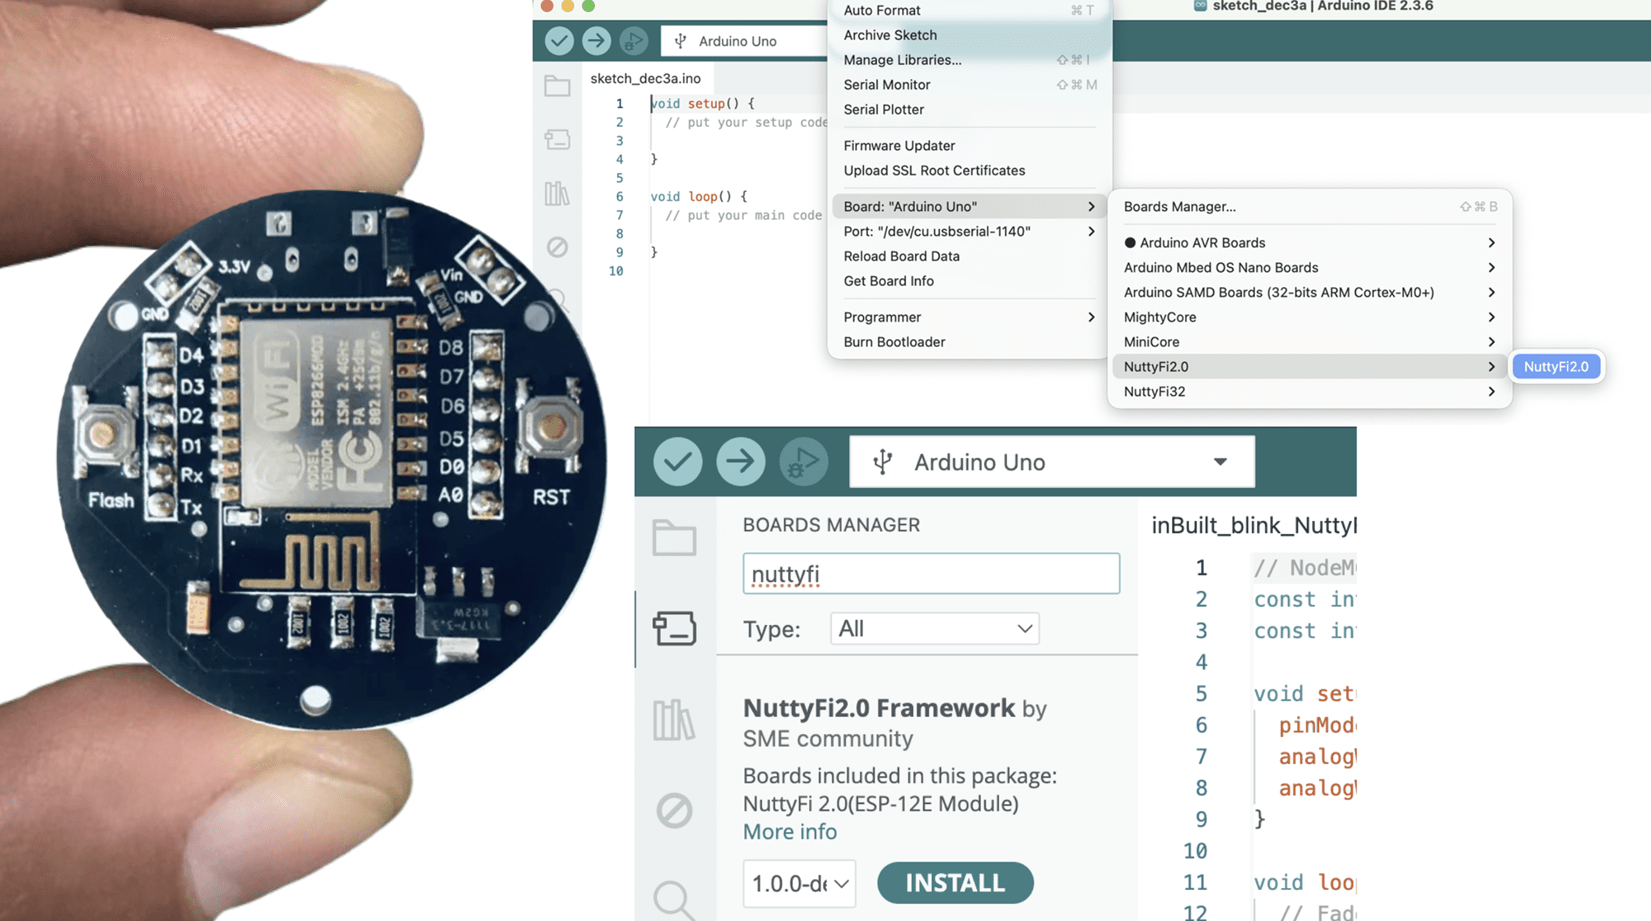
Step 4: Open Boards Manager → Tools → Board → Boards Manager…

Step 5: Search “NuttyFi” → select the NuttyFi package (publisher: SME Dehradun / Schematics Microelectronics) → Install.

Step 6: Select your board → Tools → Board → NuttyFi Framework → NuttyFi 2.0. 
Step 7: Select the Port → Tools → Port (choose the new COM/tty) like shown in below image.