Posted on Leave a comment

Apply for Test the NuttyFi32!

NuttyFi32 RoadTest Program

The NuttyFi32 RoadTest program invites engineers and developers to independently evaluate the NuttyFi32 WiFi IoT board in real-world conditions. Participants will receive hardware and are expected to test, document, and share practical feedback with the community.

What is a RoadTest?

Category: ESP32 Development Board
Manufacturer: SME Dehradun
RoadTest Status: 🟢 Applications Open
RoadTest Duration: 4 Weeks
Units Available: 5

Who Can Participate?

This RoadTest enables selected engineers to evaluate the NuttyFi32 development board in real-world conditions and publish experience-based technical feedback.
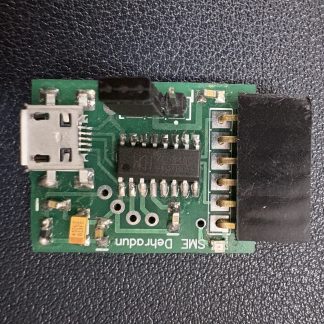
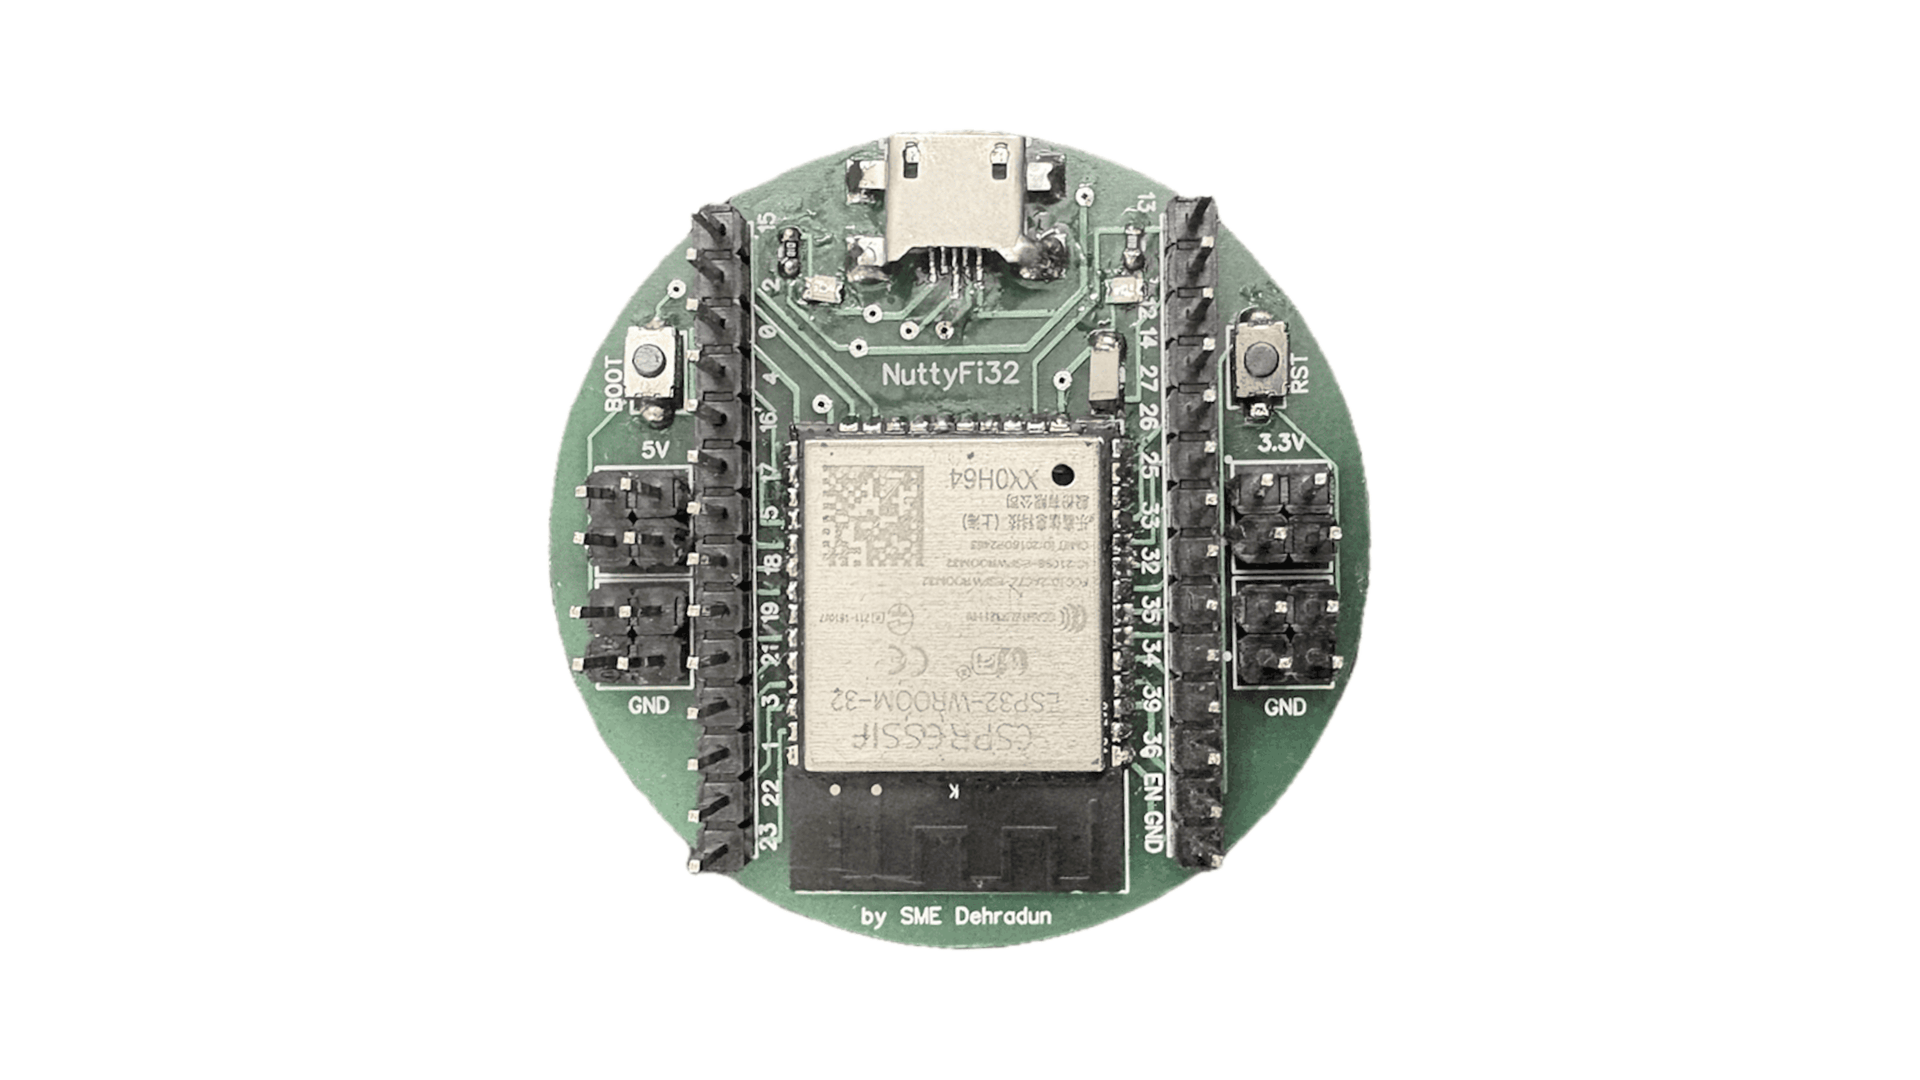
Product Overview

✅ The NuttyFi32 is a developer-focused ESP32-based board designed for Wi-Fi connectivity testing, OTA workflows, and embedded firmware validation.
✅ The RoadTest focuses on evaluating the board beyond bench testing, including real usage scenarios, stability, and developer experience.

What We Want to Lear

Participants are encouraged to evaluate the product in real projects and provide feedback on:

  • Setup and first-use experience

  • Wi-Fi connectivity and stability

  • Firmware flashing and OTA behavior

  • Reliability during continuous operation

  • Power behavior and reset handling

  • Overall developer usability

  • Limitations and improvement areas

Eligibility Criteria

This RoadTest is intended for:

  • Electronics or embedded engineers

  • IoT developers and system integrators

  • Makers with real project experience

  • Students with hands-on embedded background

Applicants should have:

  • Prior experience with ESP32 / embedded systems

  • A clear idea of how they plan to use the board

  • Willingness to document and publish feedback

RoadTest Process

Step 1 — Apply
Interested participants submit an application describing their background and intended use case.

Step 2 — Selection
Selected testers are announced after application closure. Devices are shipped to selected participants.

Step 3 — Test & Document
Testers use the product in real projects during the RoadTest period and share periodic updates.

Step 4 — Publish Review
Each tester publishes a final, structured review covering their experience, findings, and recommendations.

What We Want to Learn

Tester Responsibilities

Selected RoadTesters are expected to:

  • Use the product in a real project or application

  • Share at least one mid-RoadTest update

  • Publish a detailed final review

  • Highlight both positives and limitations

  • Provide honest, unbiased feedback

There is no requirement for positive reviews.

Suggested Review Structure

Testers should cover:

  1. Introduction & expectations

  2. Unboxing & first impressions

  3. Setup and configuration experience

  4. Project or use case description

  5. Performance and reliability observations

  6. Issues or limitations encountered

  7. Suggestions for improvement

  8. Final verdict

Photos, logs, and measurements are encouraged where applicable.

Program Guidelines

Tester Responsibilities

  • RoadTest units are provided free of cost

  • Testers keep the hardware after completion

  • Reviews must be original and honest

  • Failure to submit a review may affect eligibility for future RoadTests

  • NuttyEngineer may feature submitted content with proper credit

Apply to This RoadTest

Applications are open for a limited time.
✅ Interested participants should apply using the form below.

    Posted on

    How to Install the NuttyFi32 Board in Arduino IDE

    The NuttyFi32 board has its own dedicated Arduino Board Package, allowing users to install board support directly using a custom Board Manager JSON—without selecting a generic ESP32 board.

    While the official ESP32 board package installs support for multiple ESP32 boards, increasing storage usage and IDE complexity, NuttyFi32 uses an independent and board-specific package.

    This keeps the installation lightweight, fast, and easy to manage, making NuttyFi32 ideal for developers who prefer a clean and focused Arduino development environment.

    Follow the below steps

    ✅ Step 1: Install Arduino IDE

    1. Download and install the latest Arduino IDE:
      👉 https://www.arduino.cc/en/software

    2. Launch the Arduino IDE.

    ✅ Step 2: Add the NuttyFi32 Board Manager URL
    1. In Arduino IDE go to:

       
      File → Preferences

    Note: If you are using MacOS: Arduino IDE, Then: Settings

    2. Find the field labeled:
    Additional Boards Manager URLs

    3. Add this URL:

    https://raw.githubusercontent.com/itsbhupendrasingh/nuttyfi32/Master/package_nuttyfi32_index.json

    Tip: Arduino IDE supports multiple Additional URLs. Put each on a new line (IDE 2.x) or separate with commas (IDE 1.8.x).

    Like- https://raw.githubusercontent.com/itsbhupendrasingh/Nuttyfi/main/package/package_nuttyfi_index.json, https://raw.githubusercontent.com/itsbhupendrasingh/nuttyfi32/Master/package_nuttyfi32_index.json,

    1. Click OK.

    If you want to install NuttyFi2.0 Board in your Arduino IDE, then just follow our another tutorial guide on How to install NuttyFi2.0 Board in Arduino IDE.

    ✅ Step 3: Install NuttyFi32 Board Package

    • Go to:

      Tools → Board → Boards Manager
    • In the search bar type:

      nuttyfi32
    • When the NuttyFi32 board package appears, click:

      install
    • Wait for the installation to complete.

    ✅ Step 4: Select NuttyFi32 Board

    1. Go to: 

      Tools → Board
    2. Scroll down the list and choose:

       
      NuttyFi32

    This ensures all board-specific configurations (flash size, CPU settings, partitions, etc.) are correct.

    🪛 Step 5: Select COM Port

    1. Connect your NuttyFi32 board via USB-C cable.

    2. Go to:

       
      Tools → Port
    3. Select the port assigned to the board
      (e.g., COM5 on Windows or /dev/ttyUSB0 on Linux/macOS).

    Note: The COM port shown in the example image may be different on your system. Always select the port that appears when the NuttyFi32 board is connected.

    🧑‍💻 Step 6: USB Driver Installation (If Needed)

    If your computer does not detect the board, you may need to install NuttyFi32 USB-to-UART drivers. 

    Note: Still the NuttyFi32 board does not appear in the COM port list or you face USB driver issues, please watch this troubleshooting video below:

    🧪 Step 8: Upload a Test Sketch

    Let’s verify the NuttyFi32 board by running a simple test program.

    ✅ Led Blink Test Sketch (inbuilt).

    Copy the code below and paste it into the Arduino IDE. Upload the sketch to the NuttyFi32 board.

    After successful upload, the on-board LED will blink at an interval of 1000ms (1 second), confirming that the board is working correctly.

    ✅  Open the Serial Monitor at 115200 baud to view the LED status messages.

    Test Sketch (Blink)
    
    // Minimal Blink for NuttyFi32 inbuilt Led
    
    #const int LED_PIN = 13;   // NuttyFi32 built-in LED
    
    void setup() {
      Serial.begin(115200);
      delay(50);
      Serial.println("Simple blink start on NuttyFi32");
      pinMode(LED_PIN, OUTPUT);
    }
    
    void loop() {
      digitalWrite(LED_PIN, HIGH);   // LED ON
      Serial.println("LED ON");
      delay(1000);
    
      digitalWrite(LED_PIN, LOW);    // LED OFF
      Serial.println("LED OFF");
      delay(1000);
    }


    ✅ LED Fade Test Sketch (inbuilt)

    This example demonstrates PWM-based LED fading on the NuttyFi32 board using the ESP32 LEDC (LED Control) peripheral.

    Copy the code below and paste it into the Arduino IDE, then upload the sketch to the NuttyFi32 board.

    After a successful upload, the on-board LED connected to GPIO 13 will gradually fade in and fade out, verifying PWM functionality and confirming that the NuttyFi32 board is operating correctly.

    ✅  Open the Serial Monitor at 115200 baud to view the LED status messages.

    LED Fade (NuttyFi IoT Board)
    
    // NuttyFi32 IoT Board onboard LED (GPIO13), active-LOW
    
    const int LED_PIN = 13;      // Built-in LED on NuttyFi32
    const int PWM_CH = 0;        // Channel 0–15
    const int PWM_FREQ = 5000;   // 5 kHz
    const int PWM_RES = 8;       // 8-bit (0–255)
    
    int brightness = 0;
    int fadeAmount = 5;
    
    void setup() {
      Serial.begin(115200);
      delay(200);   // small delay for serial monitor
    
      Serial.println("NuttyFi32 LED Fade Example Started");
    
      ledcSetup(PWM_CH, PWM_FREQ, PWM_RES);
      ledcAttachPin(LED_PIN, PWM_CH);
    }
    
    void loop() {
      ledcWrite(PWM_CH, brightness);
    
      // print current brightness
      Serial.print("Brightness: ");
      Serial.println(brightness);
    
      brightness += fadeAmount;
    
      if (brightness <= 0 || brightness >= 255) {
        fadeAmount = -fadeAmount;
      }
    
      delay(30);
    }


    ⭐ NuttyFi2.0 Resources

    For source code, board packages, updates, and documentation, visit the official NuttyFi GitHub repository: